Trimming changes the time range of a video. It is useful for removing the wait before a recording starts, keeping one passage from a longer clip, or preparing a shorter file for your next project. The current editor also includes crop and rotation controls; those change the picture rather than the start and end time.
1. Add the Video and Open Its Editor
Add your video to the main queue and open its editing controls. Check that you have selected the intended file before making changes. Preview the clip so you know where the section you want begins and ends.
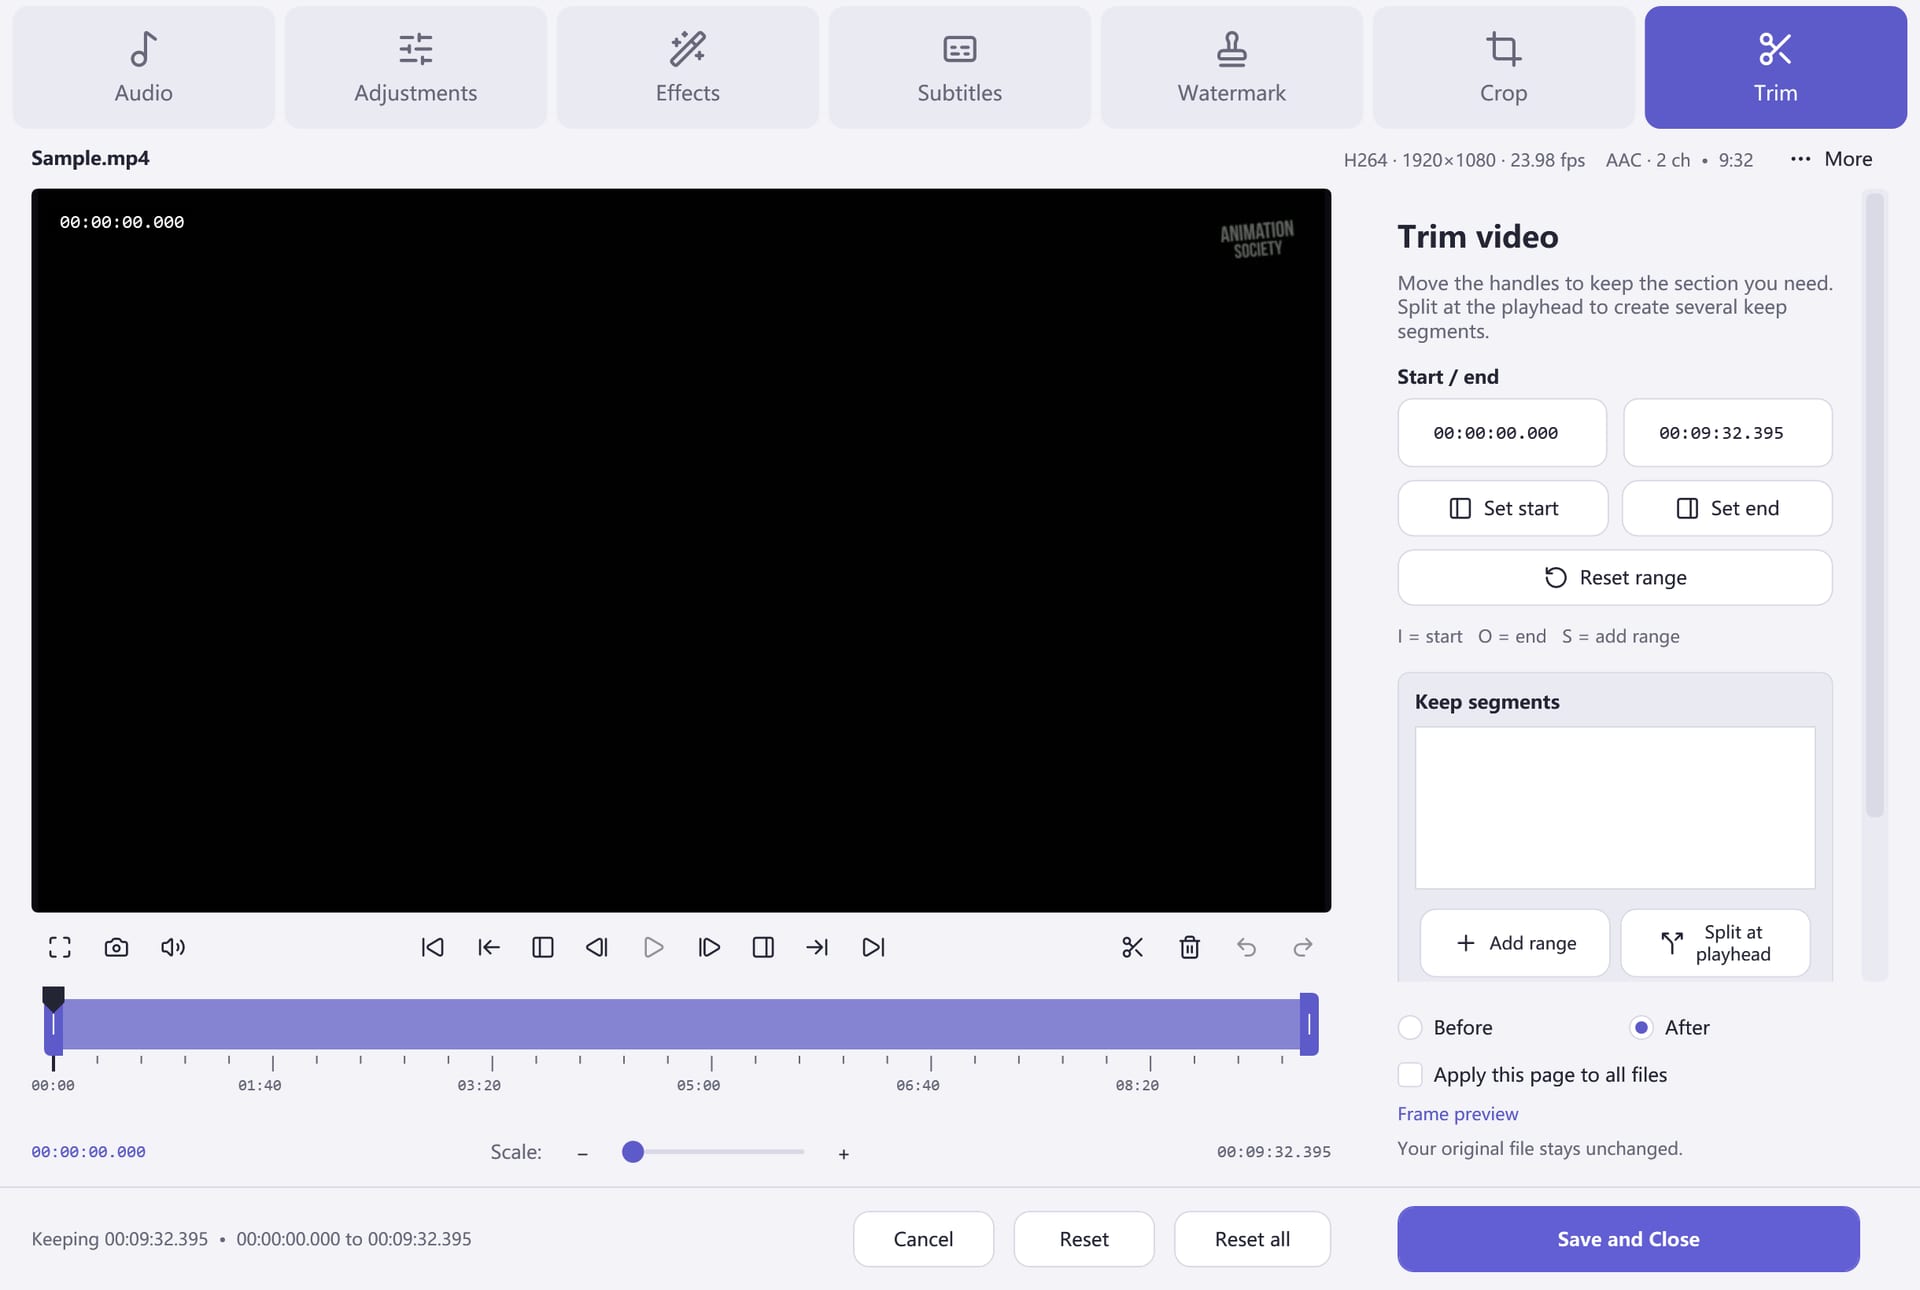
2. Set the Start and End
Use the trimming controls to define the beginning and end of the section you want to keep. Preview around both boundaries, and adjust them until the cut includes the action and sound you need. A little context on either side can make a clip easier to understand.
The editor supports segments as well as a single trim. If you use several segments or joining controls, review their order before exporting. Keep the source file available until you have checked the finished output.
3. Choose the Output
Return to the main conversion workflow. Select your output format and preset, choose an output folder, and start Convert. MP4 with H.264 video and AAC audio is a useful compatibility test when you do not have another specific requirement.
4. Review the New Clip
Play the resulting file from beginning to end. Check that the start and end are correct, that sound is present where expected, and that the converted clip opens in its destination app. Trimming and conversion create a new output; retain your original recording for future edits.
The images and instructions on this page describe version 8.2.0. Earlier releases used a different interface. This original tutorial address remains available so existing links continue to reach useful guidance.
For the full output workflow, see how to convert video formats.